
Fact: Coffee is the second most popular beverage in the world.
Myth: Brewing into a coffee airpot is easy; everyone knows how to do that.
Follow the simple steps below to master this mainstream brewing equipment.
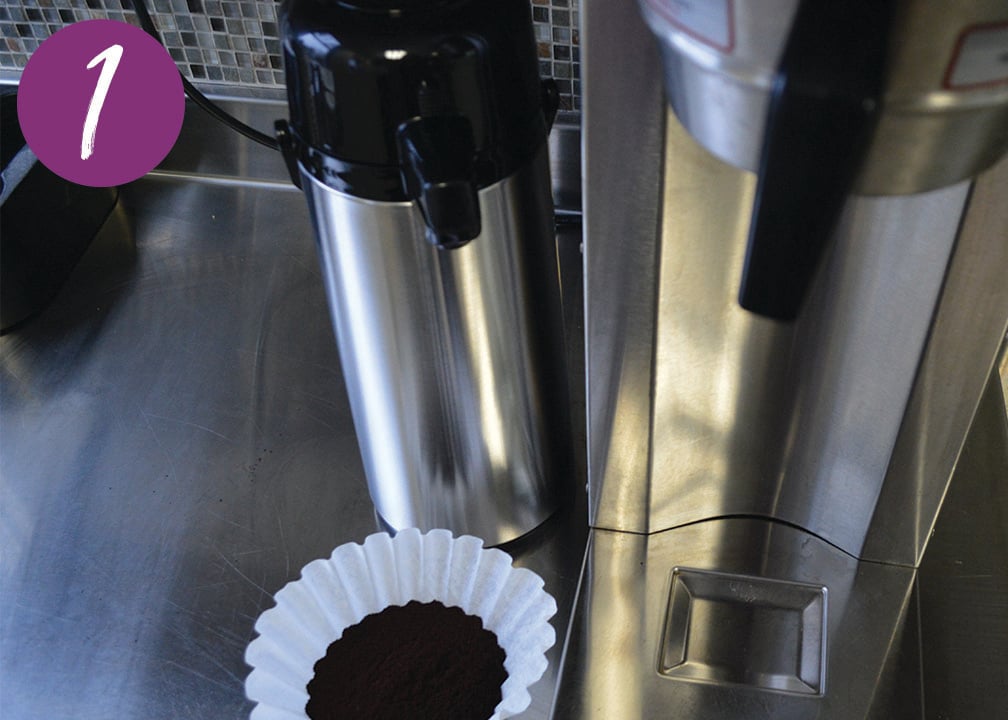
Step 1: Gather Equipment
When using an airpot and brewer to brew coffee, you will of course need an airpot and brewer. When shopping for these items, make sure you get a brewer that is compatible with your airpot. Most brewers will fit standard sizes of airpots (1.9-, 2.2-, 2.5-, and 3-liter capacities), but it is important to double check. Other necessary items include coffee (grounded at auto drip) and one coffee filter per batch.
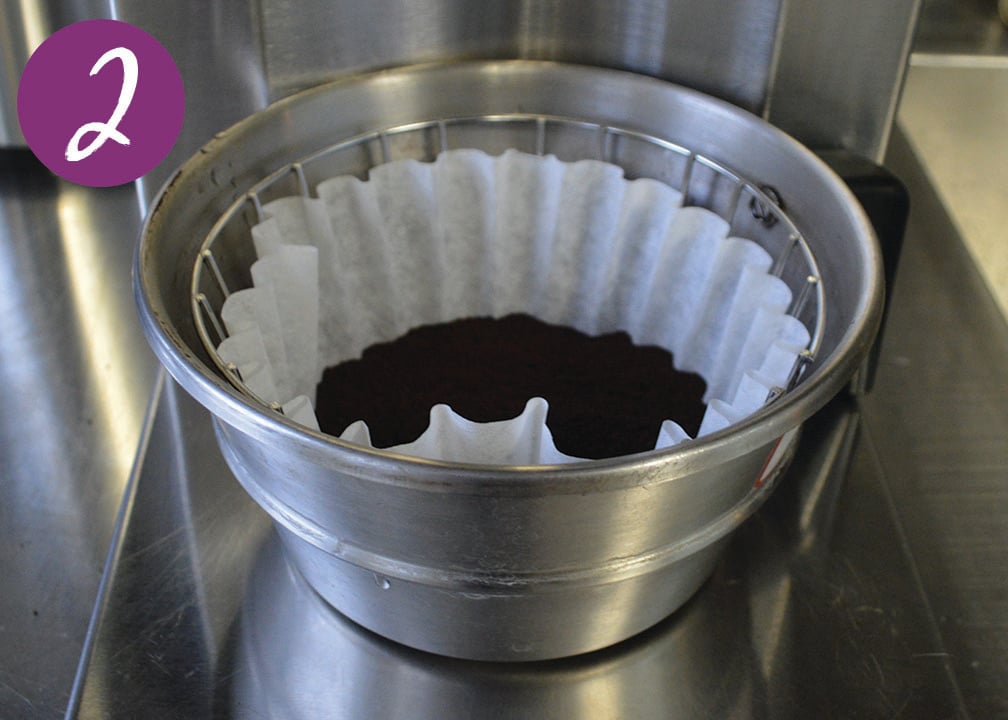
Step 2: Place Coffee in Brew Basket
First, make sure to use only one coffee filter (two filters will be too thick to brew). Then, empty the appropriate amount of grounds into the filter and place the filter filled with coffee into the brew basket.
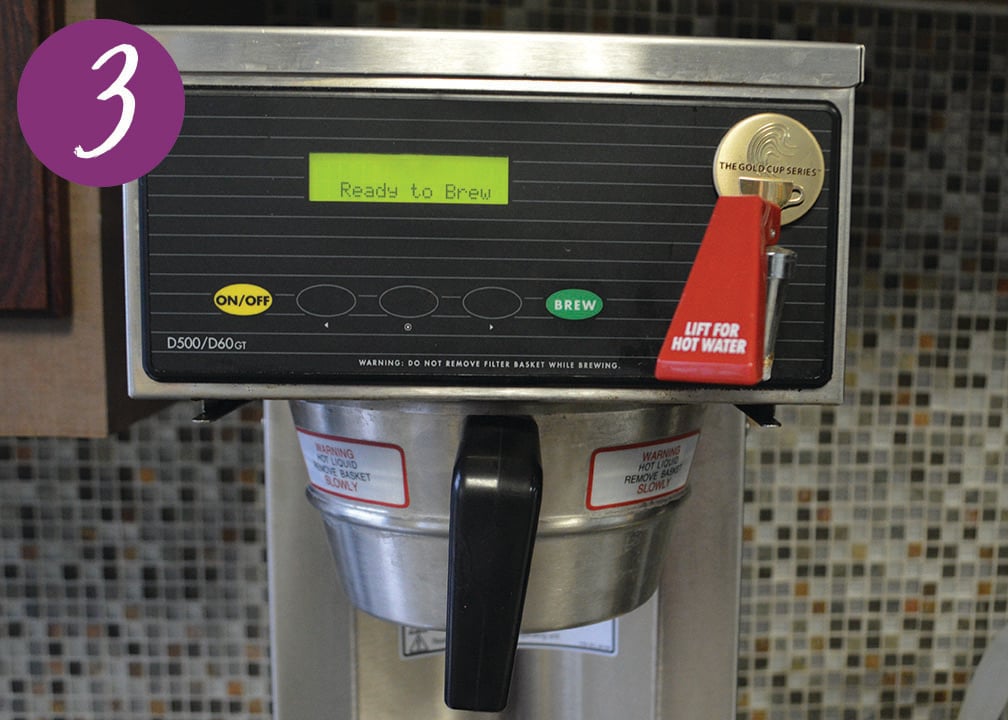
Step 3: Prepare to Brew
Slide the brew basket into position at the top of the brewer. There should be hooks or ledges on the sides to help guide the basket into place.
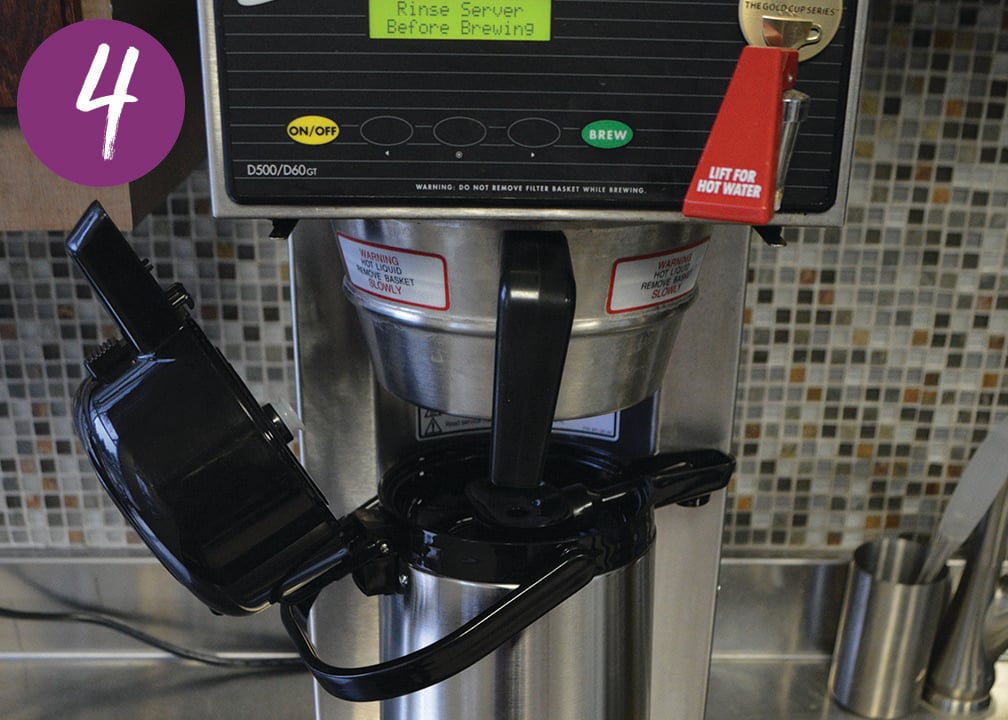
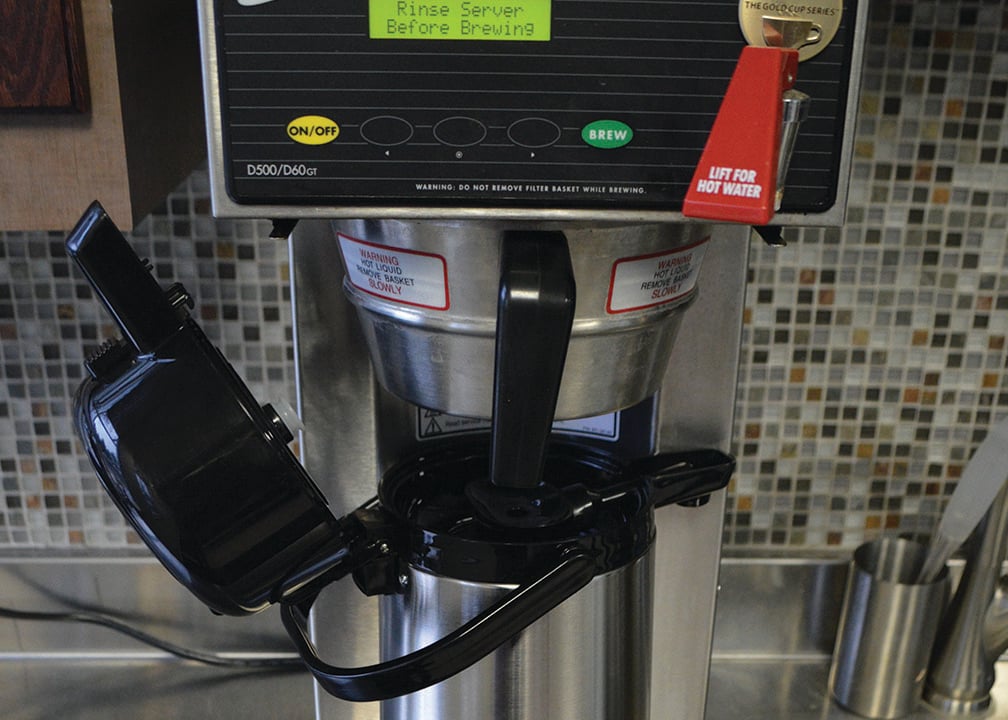
Step 4: Add Airpot to Brewer
Release the lid off the airpot and flip open, or take off completely so it fits under the brewer correctly. Try to line up the suction pipe inside the airpot with the brew head, so that the coffee will brew directly into the hole on the suction pipe. If this is not lined up perfectly, it won't ruin the process, but the closer it is aligned the less likely there will be a big mess.
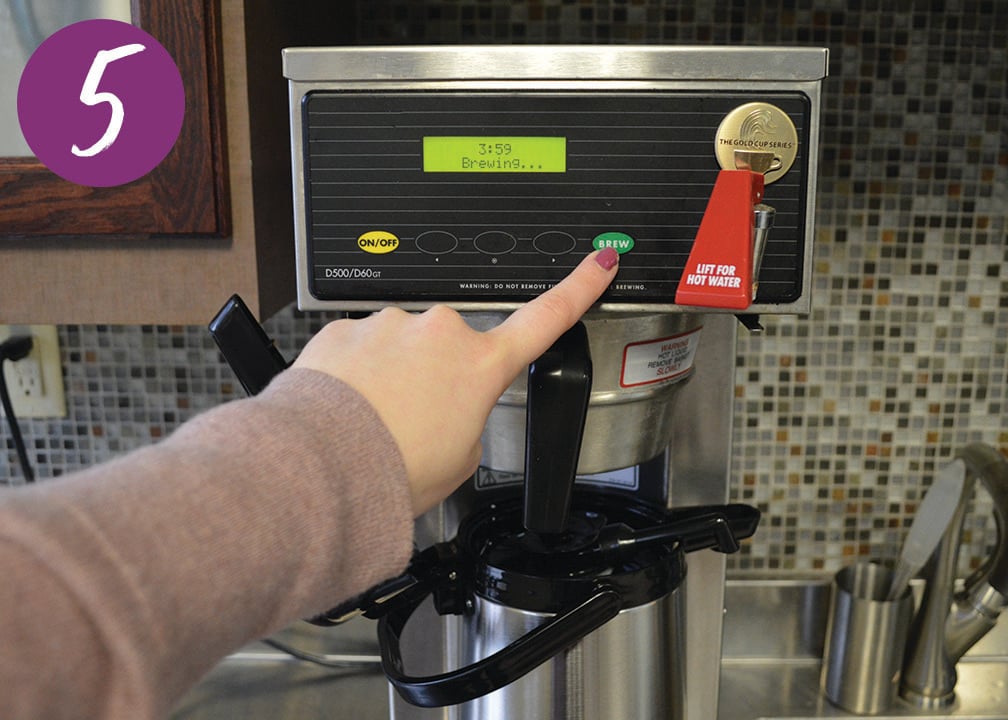
Step 5: Click Brew
Depending on your brewer, you may have to click or hold down the brew button. When setting up your brewer, you will be able to select the capacity you want it to brew. This will be the same for all future batches, so make sure you are always using the same size airpot or reset when switching between sizes.
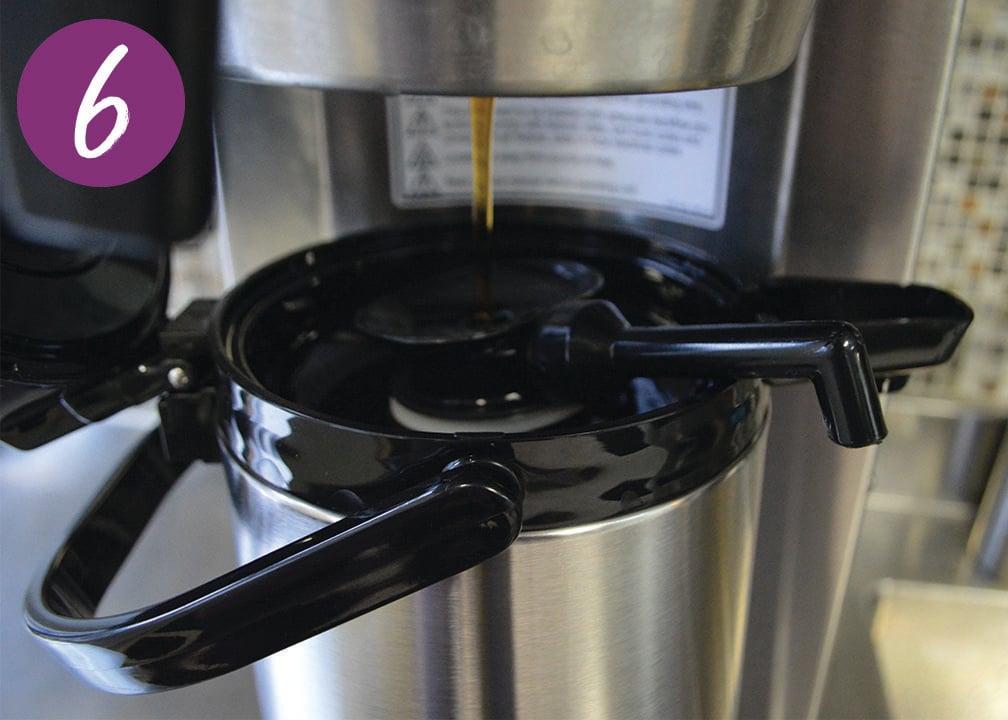
Step 6: Let it Brew
After starting the brewing process, it will take approximately five minutes (depending on the brewer) to brew a full pot. Quick brewing tip: Move the suction pipe to the side of the airpot, so that it does not plug the center hole. This will allow the coffee to brew without overflowing if it isn't exactly aligned with the hole on the brew basket.

Step 7: Dump Coffee Grounds
Once the coffee stops brewing, wait a minute or two for it to stop dripping. Then, take the brew basket out, and throw away or compost the used coffee grounds.
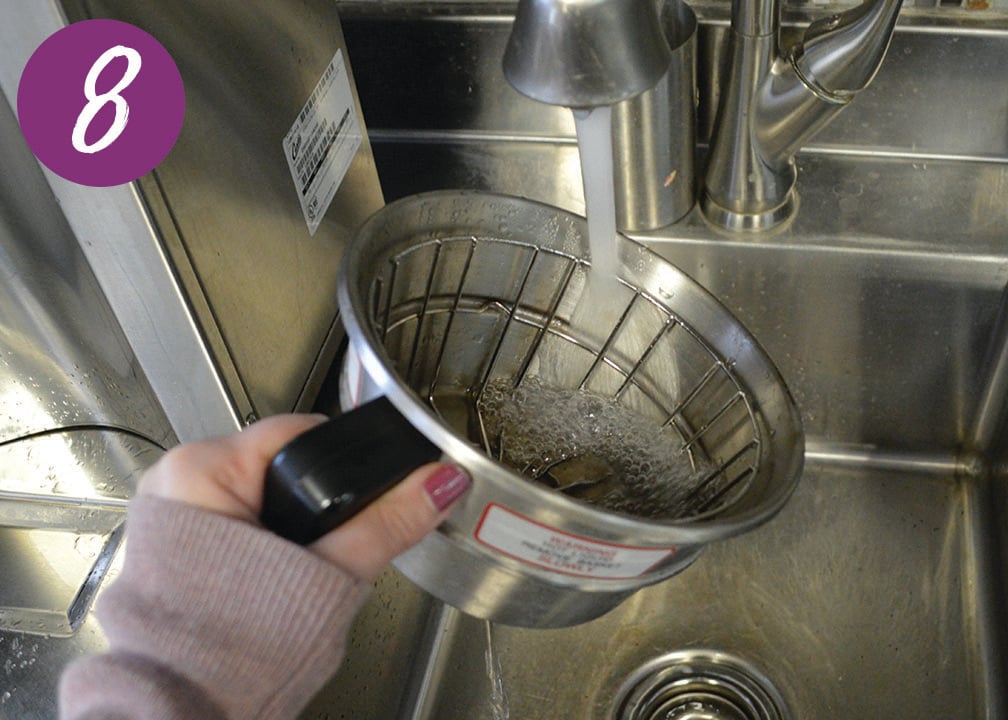
Step 8: Wash Brew Basket
Finally, rinse out the brew basket to remove any coffee grounds that may have splashed outside of the filter. Put the brew basket back in the brewer to store, or start again at step one and brew another pot!
After following these steps, the brewed coffee can be easily stored and served from the airpot. Our glass lined airpots will keep your coffee hot for 6–8 hours, while our stainless lined airpots will keep your coffee hot for 4–6 hours. Are you ready to start using airpots in your business? Check out our Eco-Air® Airpots or our Signa-Air Airpots today.